LittleHorse Server
Let's get LittleHorse up and running in your own environment! In this lesson, we will use our quickstart from our Examples repo to run your first WfSpec.
Background
Before we get started, let's define some concepts that we will use today:
- The LittleHorse Kernel is the digital kernel or scheduler in LittleHorse. The LittleHorse Kernel runs somewhere (in the cloud, in your environment, etc) and exposes a grpc API to clients. It is the distributed analog of the JVM in our analogy to Java.
- The Kernel comprises of the "Server" (backend) and the "Dashboard" (frontend).
- A Task Definition (
TaskDef) is a blueprint for a single unit of work that can be executed in LittleHorse. It is analogous to a method signature in Java. An instance of aTaskDef(when you run a task) is called aTaskRun. - A Task Worker (
LHTaskWorker) is a long-lived process that executes tasks. A Task Worker is code that you write, which uses our SDK to connect to LittleHorse, listens on a Task Queue, and executes your function/method every time LittleHorse puts a task on the queue. - A Workflow Specification (
WfSpec) defines the logic of a process that is executed in LittleHorse. It is similar to a program in Java. - A Workflow Run (
WfRun) is a running instance of aWfSpec. It is similar to a running instance of a program in Java. - An External Event (
ExternalEvent) represents something that happens outside of your workflow. You can use anExternalEventto make your workflow wait for something to happen, like an asynchronous response from another system or waiting for a document be signed.
For a more in-depth background on the Kernel, we recommend you check out the Concepts Documentation! It is our favorite part of the documentation.
Today's Workflow
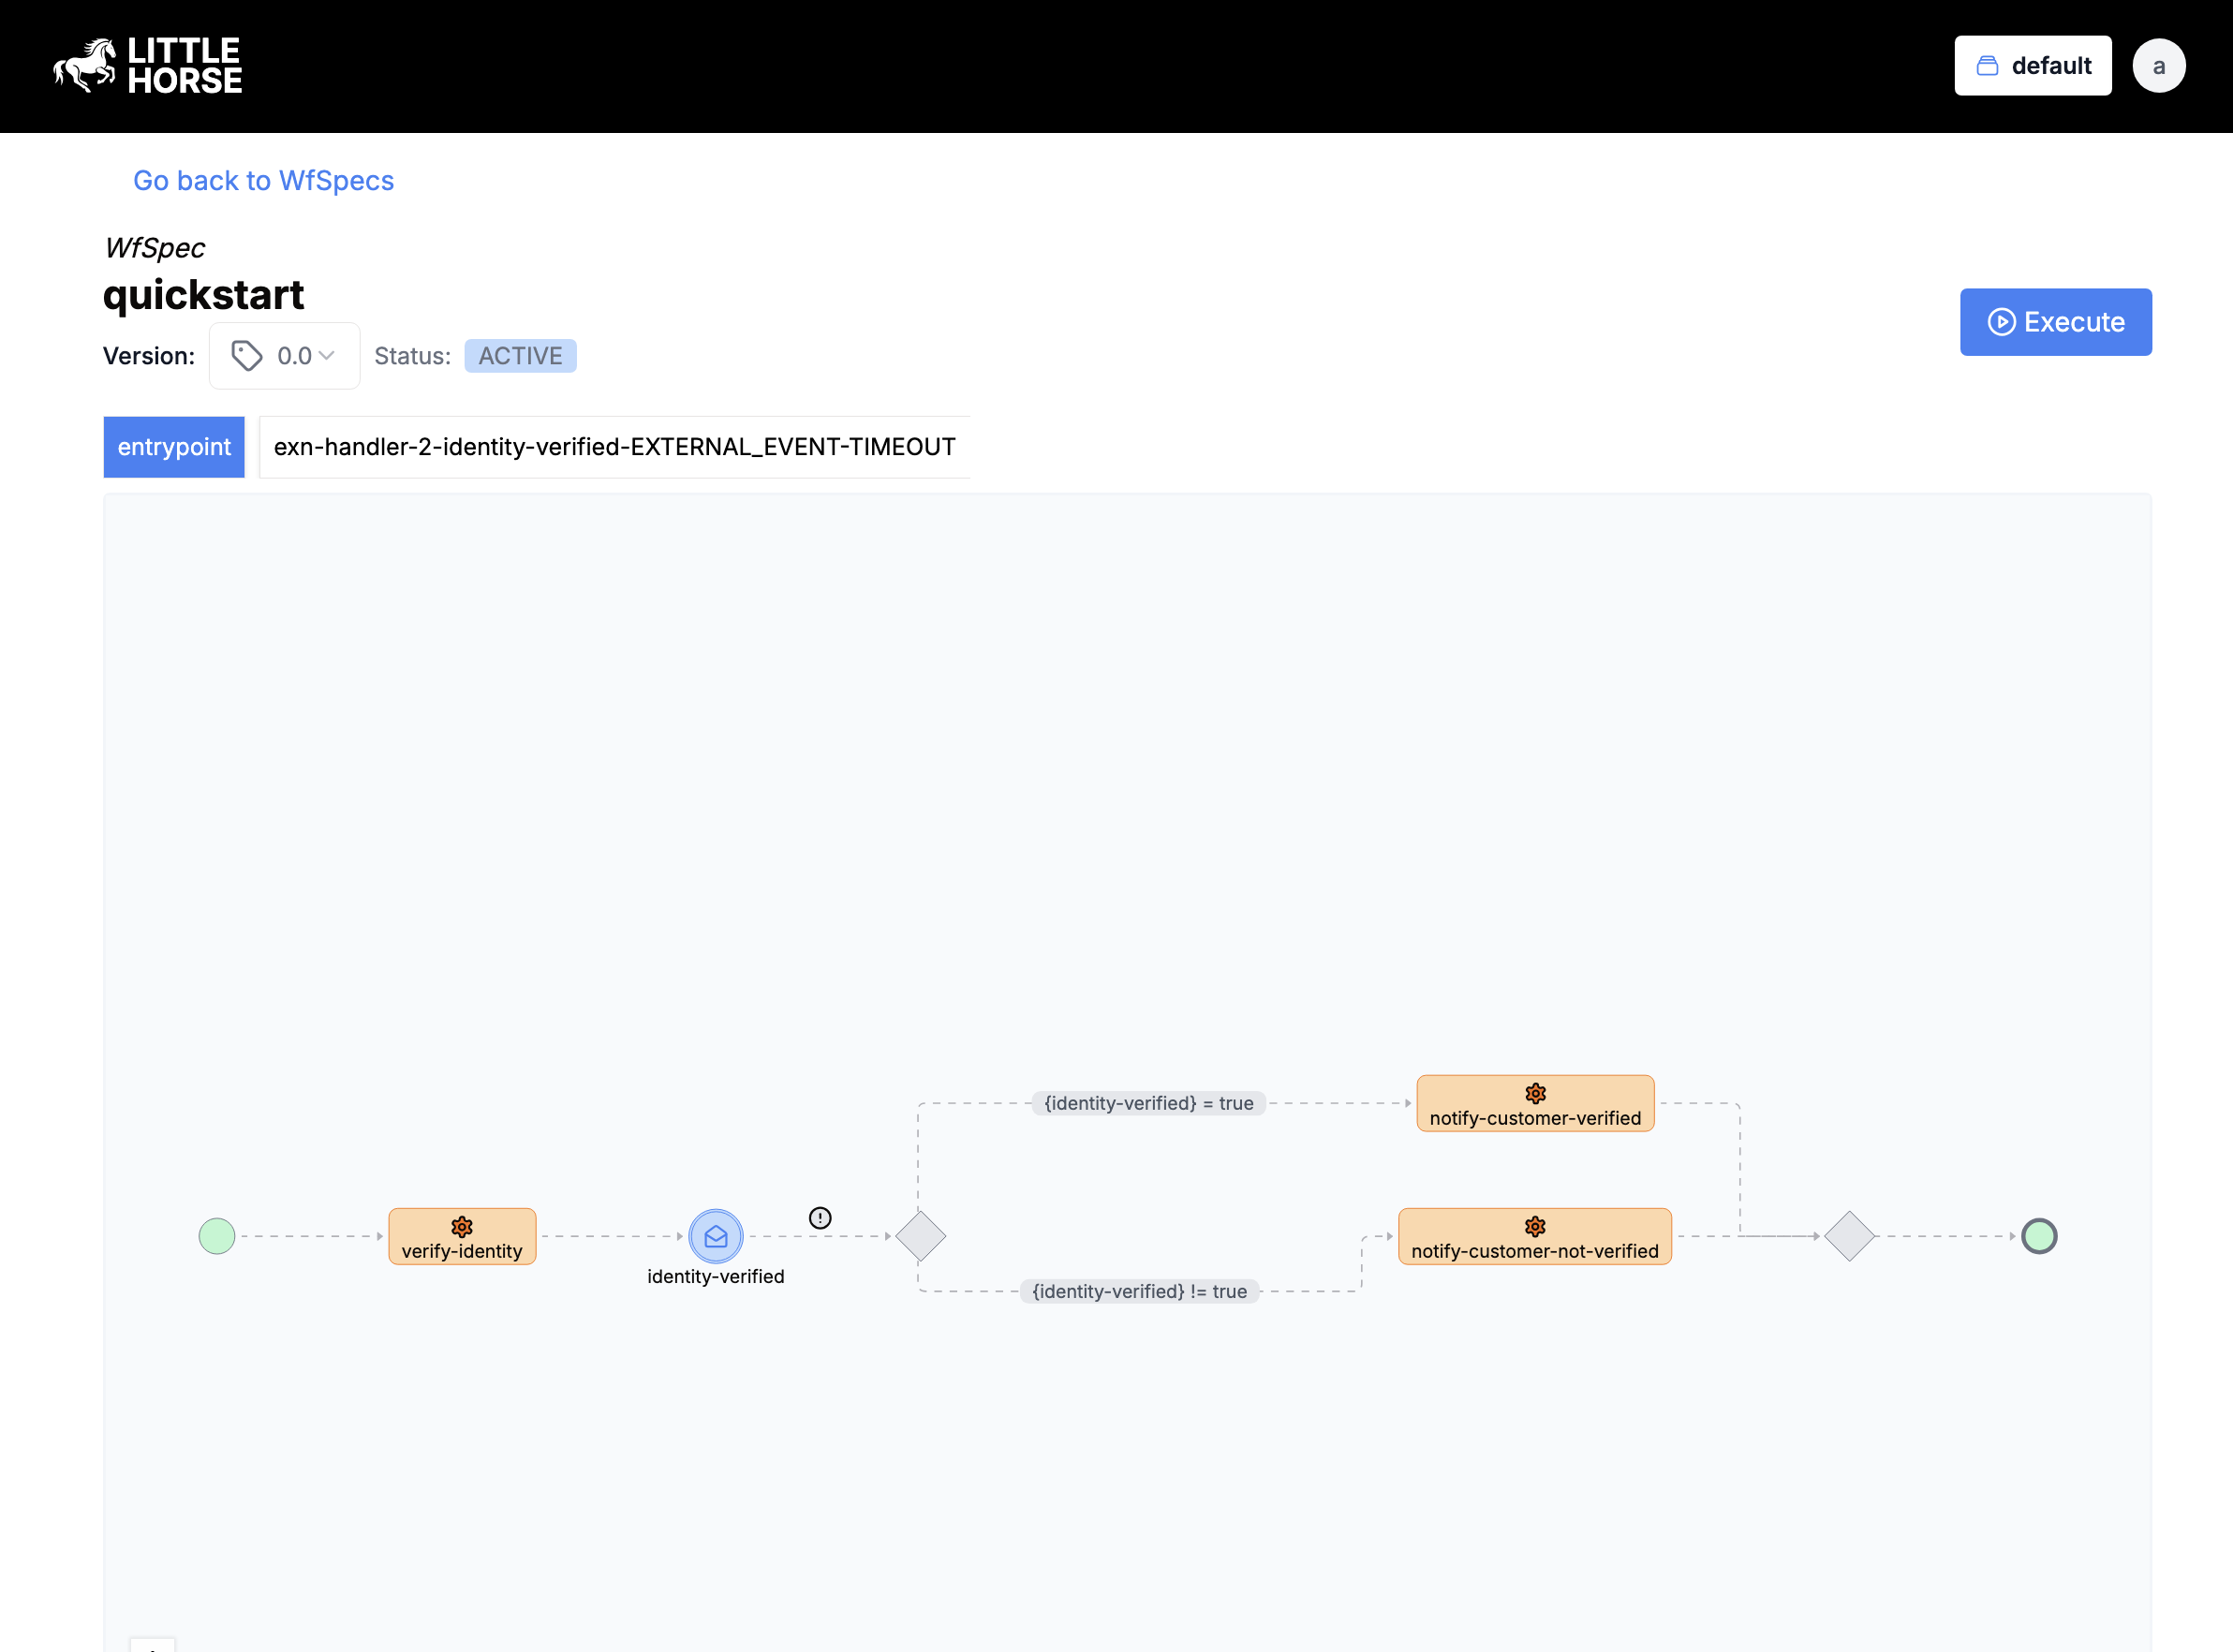
The quickstart WfSpec that we will run today models a "Know-Your-Customer" process. The workflow accepts information about a potential user of a well-regulated enterprise. The workflow will then:
- Request a third-party service to perform an identity check on the user.
- Wait for the service to respond with an answer. This is asynchronous, so we will use an
ExternalEvent. - Either notifies the customer of acceptance or rejection depending on the result of the identity verification step.
All of the tasks we execute simply print to the console for convenience. However, it's just plain old Java/Go/Python code, so you can easily see how we would extend them to make real API calls.

System Setup
For this tutorial, your system will need:
as well as the language of your choice:
- Java
- Python
- Go
- C#
Java 11 or greater
Python 3.9 or greater
Go 1.21.3 or greater
.NET 8.0 or greater
First, we will run a LittleHorse Server and Dashboard for development purposes in docker (using the lh-standalone docker image):
Make sure you have at least 2GB of RAM allocated to Docker and ports 2023, 8080, and 9092 must be free.
docker run --pull always --name lh-standalone --rm -d -p 2023:2023 -p 8080:8080  -p 9092:9092 \
  ghcr.io/littlehorse-enterprises/littlehorse/lh-standalone:latest
If you are on Linux, you can simplify the command to run the container by making use of Docker's host network. This option has multiple bugs with MacOS:
docker run --pull always --name lh-standalone --rm -d --net=host \
  ghcr.io/littlehorse-enterprises/littlehorse/lh-standalone:latest
While the image is downloading, you can install our CLI tool, lhctl this CLI is used to interact with the LittleHorse Kernel:
brew install littlehorse-enterprises/lh/lhctl
Once the docker image is running and initialized, you should be able to verify connectivity with the lhctl whoami command, as follows:
>lhctl whoami
{
  "id":  {
    "id":  "anonymous"
  },
  "createdAt":  "2024-12-17T00:12:10.693Z",
  "perTenantAcls":  {},
  "globalAcls":  {
    "acls":  [
      {
        "resources":  [
          "ACL_ALL_RESOURCES"
        ],
        "allowedActions":  [
          "ALL_ACTIONS"
        ],
        "name":  ""
      }
    ]
  }
}
Lastly, you should be able to see the dashboard on http://localhost:8080:
Once you have verified that you have connectivity with the lhctl command, the rest of this tutorial will assume that you have a running LittleHorse Kernel and dashboard.
Running the Quickstart
We will now follow along with our Quickstart for the language of your choice. Clone the examples repository and navigate into it the quickstart directory:
git clone https://github.com/littlehorse-enterprises/lh-examples.git
cd lh-examples/quickstart
- Java
- Python
- Go
- C#
cd java
The folder contains 3 main files:
Main.java: This file is the executable entrypoint. This file registers the Workflow Specification (WfSpec), Task Definition (TaskDef), External Event Definition (ExternalEventDef), and runs the task worker.QuickstartWorkflow.java: Contains Java code defining theWfSpecusing the LittleHorse SDK.KnowYourCustomerTasks.java: Contains the plain old Java for our task workers.
cd python
python -m venv .venv
source .venv/bin/activate # On Windows: .venv\Scripts\activate
pip install -r requirements.txt
The folder contains 2 main files:
register.py: Contains Python code defining theWfSpecusing the LittleHorse SDK and registers all the metadata.workers.py: Contains plain old Python for our task workers.
cd go
The folder contains 3 main files:
main.go: This file is the executable entrypoint. This file registers the Workflow Specification (WfSpec), Task Definition (TaskDef), External Event Definition (ExternalEventDef), and runs the task worker.quickstart_workflow.go: Contains Go code defining theWfSpecusing the LittleHorse SDK.know_your_customer_tasks.go: Contains the plain old Go for our task workers.
cd csharp
The folder contains 3 main files:
QuickstartWorkflow.cs: Contains C# code defining theWfSpecusing the LittleHorse SDK.Program.cs: This file is the executable entrypoint. This file registers the Workflow Specification (WfSpec), Task Definition (TaskDef), External Event Definition (ExternalEventDef), and runs the task worker.KnowYourCustomerTasks.cs: Contains the plain old C# for our task workers.
To understand how exactly the code works, we recommend you check out the Concepts documentation.
Registering a WfSpec
A Workflow Specification, or WfSpec, is metadata representing a series of steps to be executed when we execute a WfRun. You can think of a WfSpec as a blueprint for a business process.
We need to first register the WfSpec and TaskDef so that LittleHorse knows what to do when we tell it to execute a quickstart WfRun.
To register the WfSpec, you can run:
- Java
- Python
- Go
- C#
./gradlew run --args register
python -m quickstart.register
go run ./src register
dotnet run -f net8.0 -- register
You can edit the lh-quickstart-dotnet.csproj to support different versions if you don't have net8.0.
This command will do 3 things:
- Create an
ExternalEventDefcalledidentity_verified. - Create 3
TaskDefs calledverify_identity,notify_customer_verified, andnotify_customer_not_verified. - Create a
WfSpeccalledquickstart, which accepts 2STRvariablesfirst-nameandlast-nameand 1 MASKEDINTvariablessn.
At this point, you should be able to view the WfSpec in your LittleHorse Dashboard on http://localhost:8080/.
The next lessons will explain how to write a Task Worker and define a WfSpec. Patience, young Padawan.
Executing a WfRun
Now that we have registered the WfSpec and TaskDef, we need to tell LittleHorse to execute a WfRun. We can do that in three ways:
- Using the
lhctl runcommand. - Using our GPRC Client.
- Using the dashboard.
In this tutorial, we will use the lhctl run command to execute the WfSpec for simplicity. If you want to learn how to run a workflow from code using our SDK's, check out this documentation.
Let's execute a WfRun:
lhctl run quickstart full-name 'Obi-Wan Kenobi' email obiwan@jedi.temple ssn 123456789
This does two things. lhctl tells LittleHorse Kernel to execute the quickstart WfSpec. The command also passes the full-name, email, and ssn arguments with the values of Obi-Wan Kenobi, obiwan@jedi.temple, and 123456789 respectively.

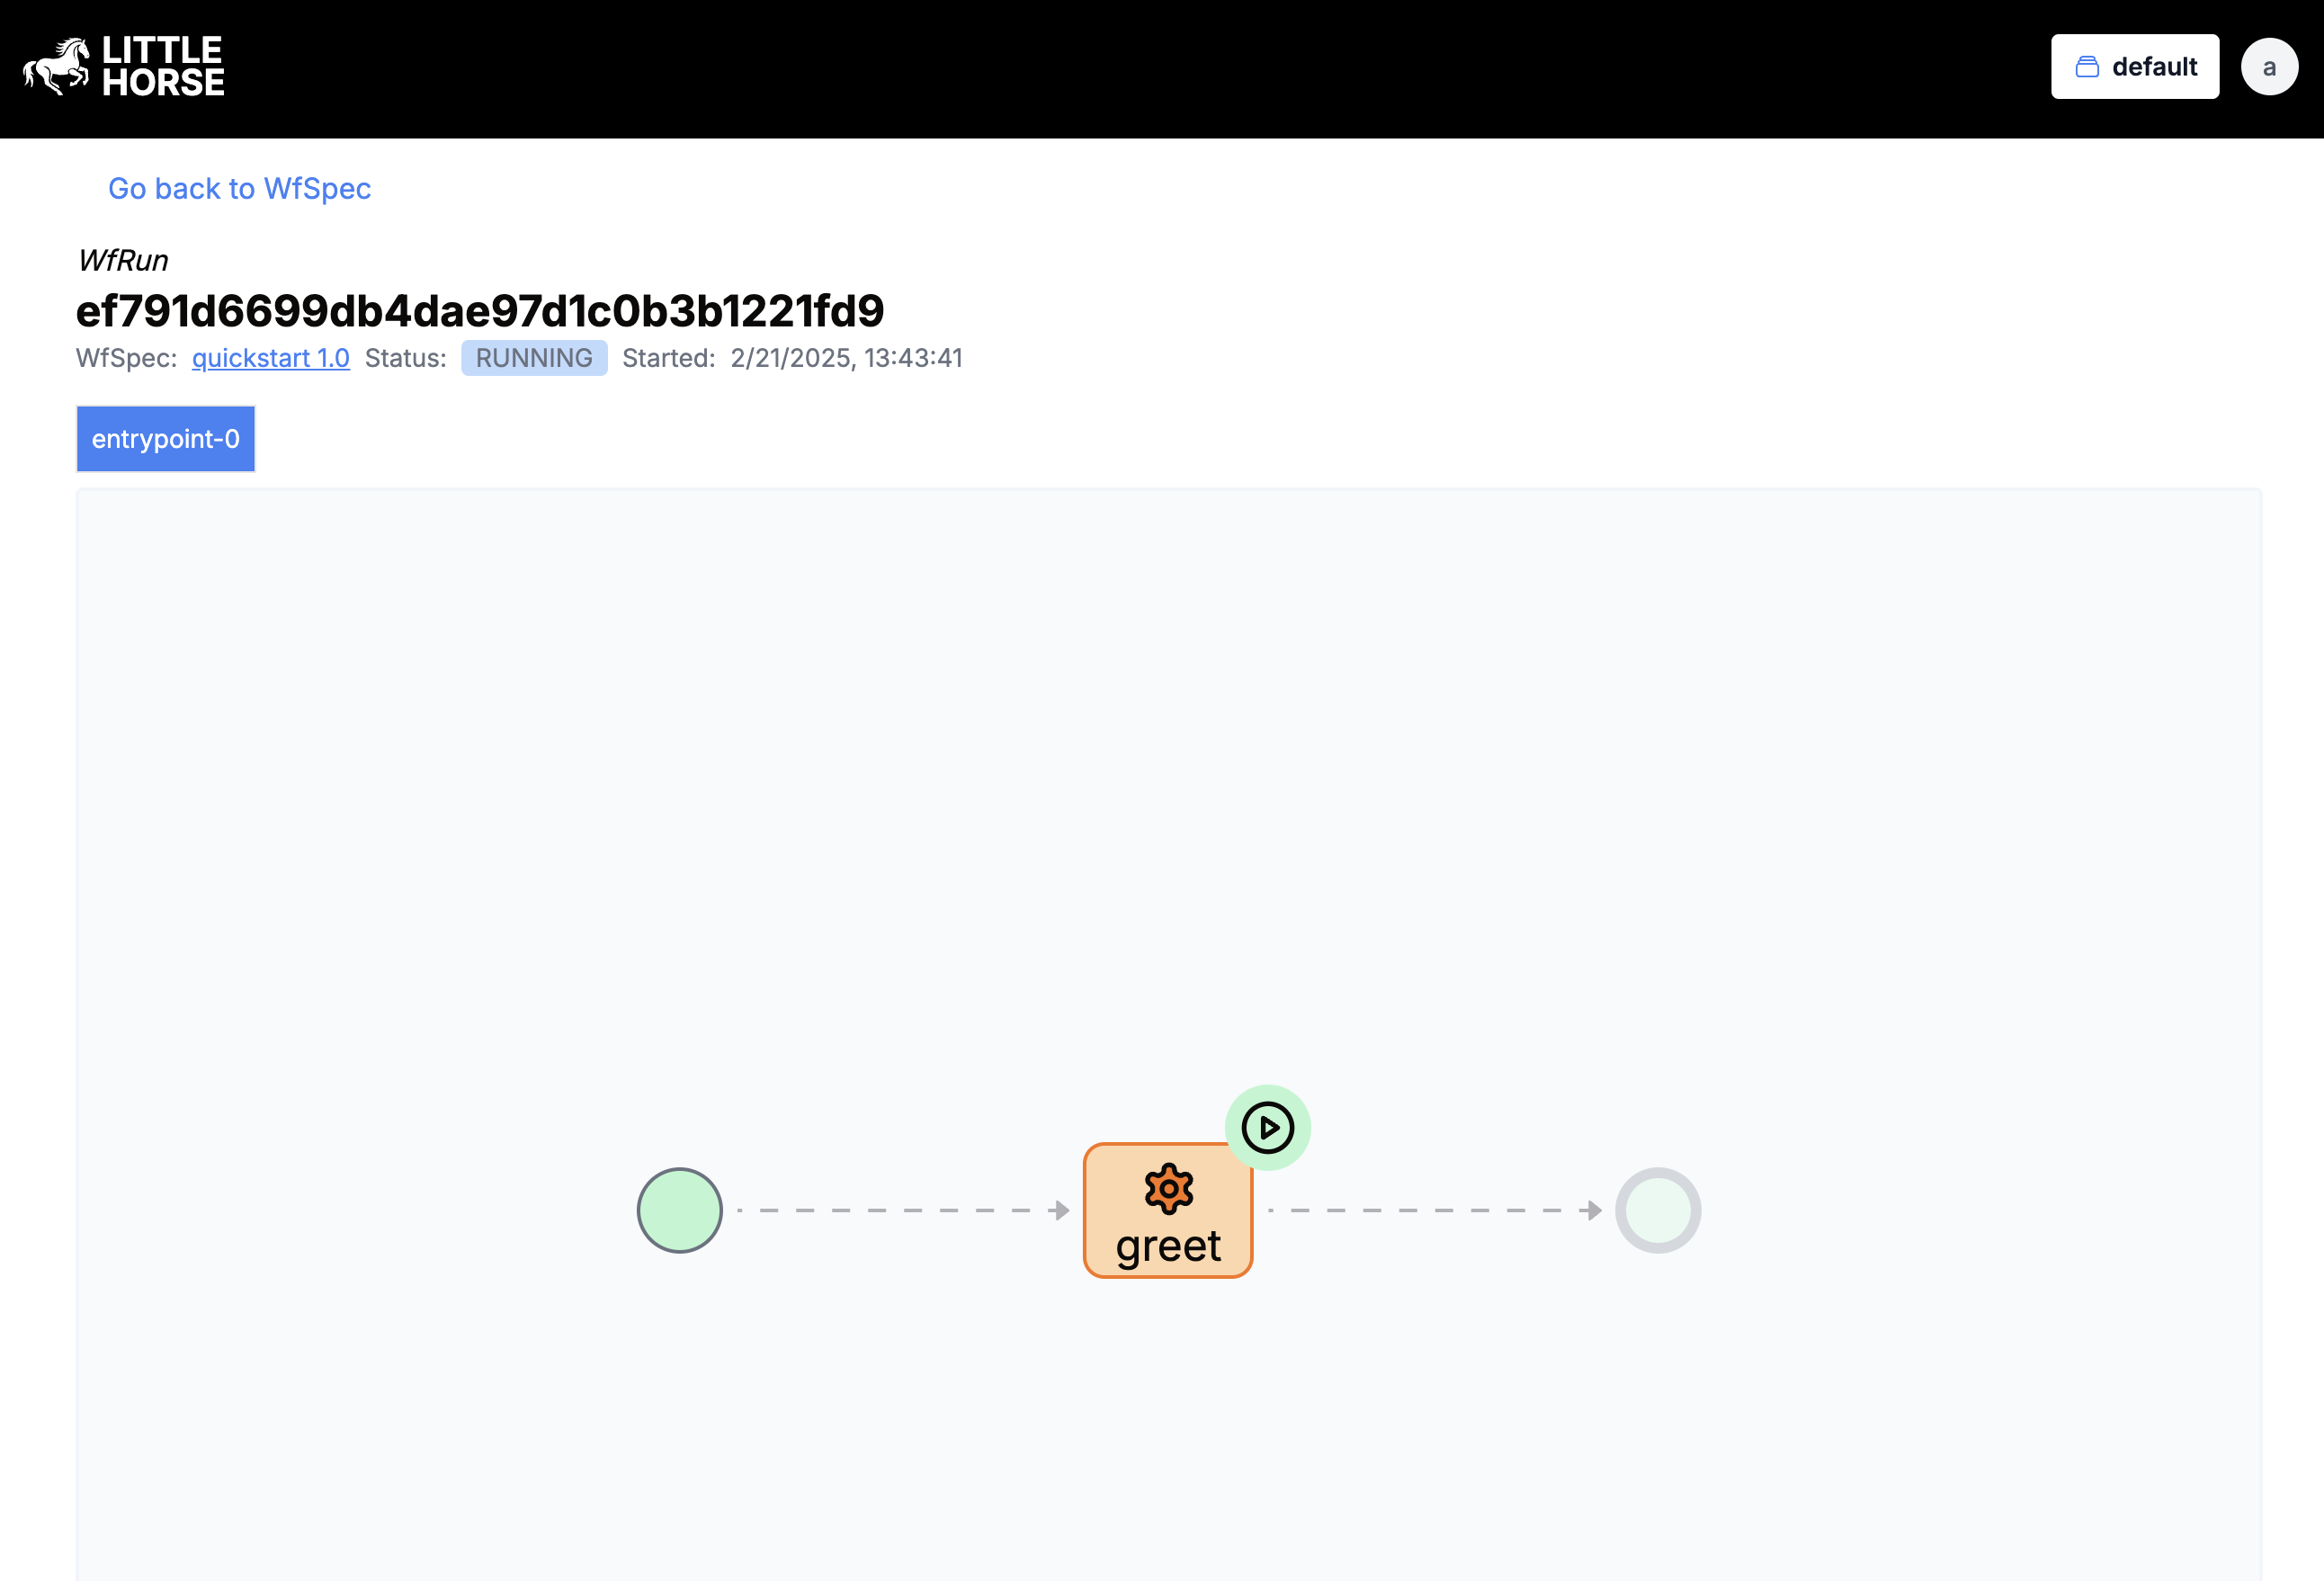
As you can see, the WfRun is in the RUNNING state, and the TaskRun is in the TASK_SCHEDULED state.
Running the Task Workers
Why is our WfRun "stuck"? Because no task worker is there to execute the verify_identity TaskRun that is currently in LittleHorse's Task Queue! Let's fix that by starting our Task Worker:
The quickstart has been configured for this task to fail 25% of the time to demonstrate LittleHorse's ability to handle retries and failures.
- Java
- Python
- Go
- C#
./gradlew run --args workers
python -m quickstart.workers
go run ./src workers
dotnet run -f net8.0 -- workers

Posting an Event
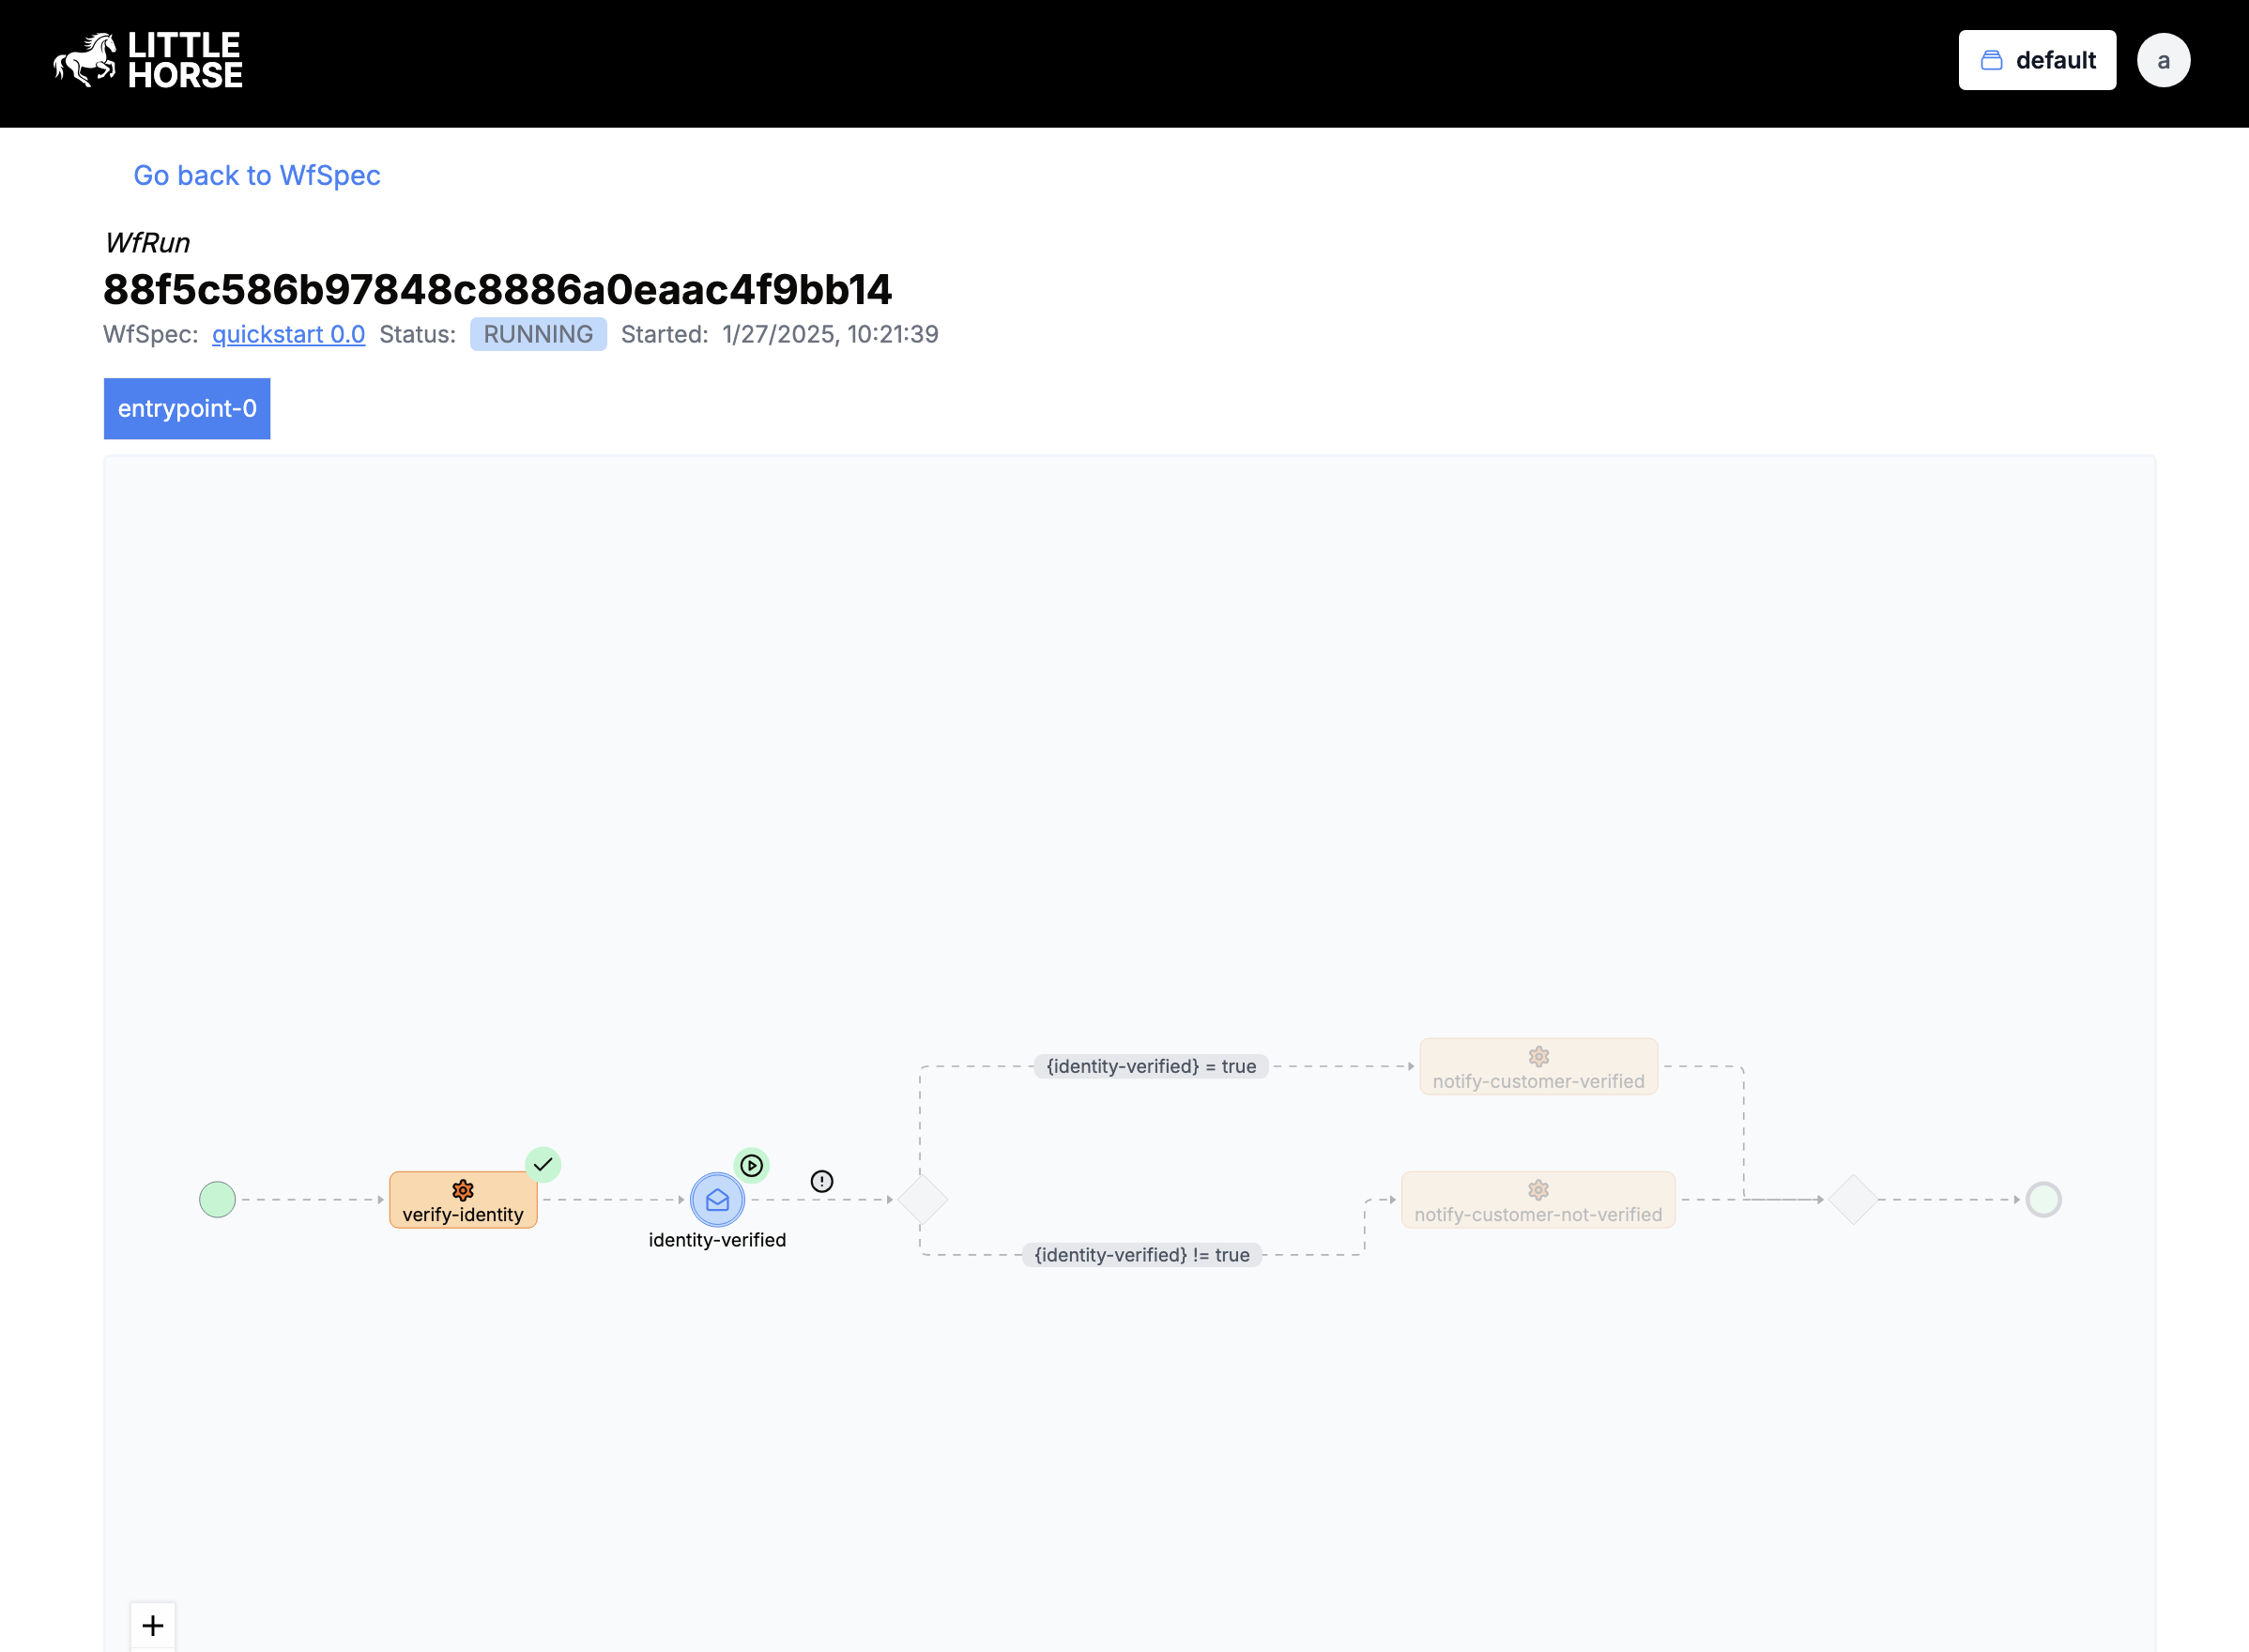
You will notice that the verify-identity task completed successfully but, the workflow is still in the RUNNING state. This is because the workflow is waiting for an external event identity-verified to be posted to the workflow.
Normally in a real-world application, you would have some other service that would post an event to the workflow with webhooks. For this example, we will just use the lhctl command to post an event to the workflow. The WfSpec utilizes the Correlated Events feature such that the identity-verified event can be matched to a waiting WfRun by the email address.
Without going too deep into the internals of that feature, let's post a CorrelatedEvent and unblock our WfRun:
# lhctl put correlatedEvent <correlation key> <ExternalEventDef Name> <variable type> <value>
lhctl put correlatedEvent obiwan@jedi.temple identity-verified BOOL true
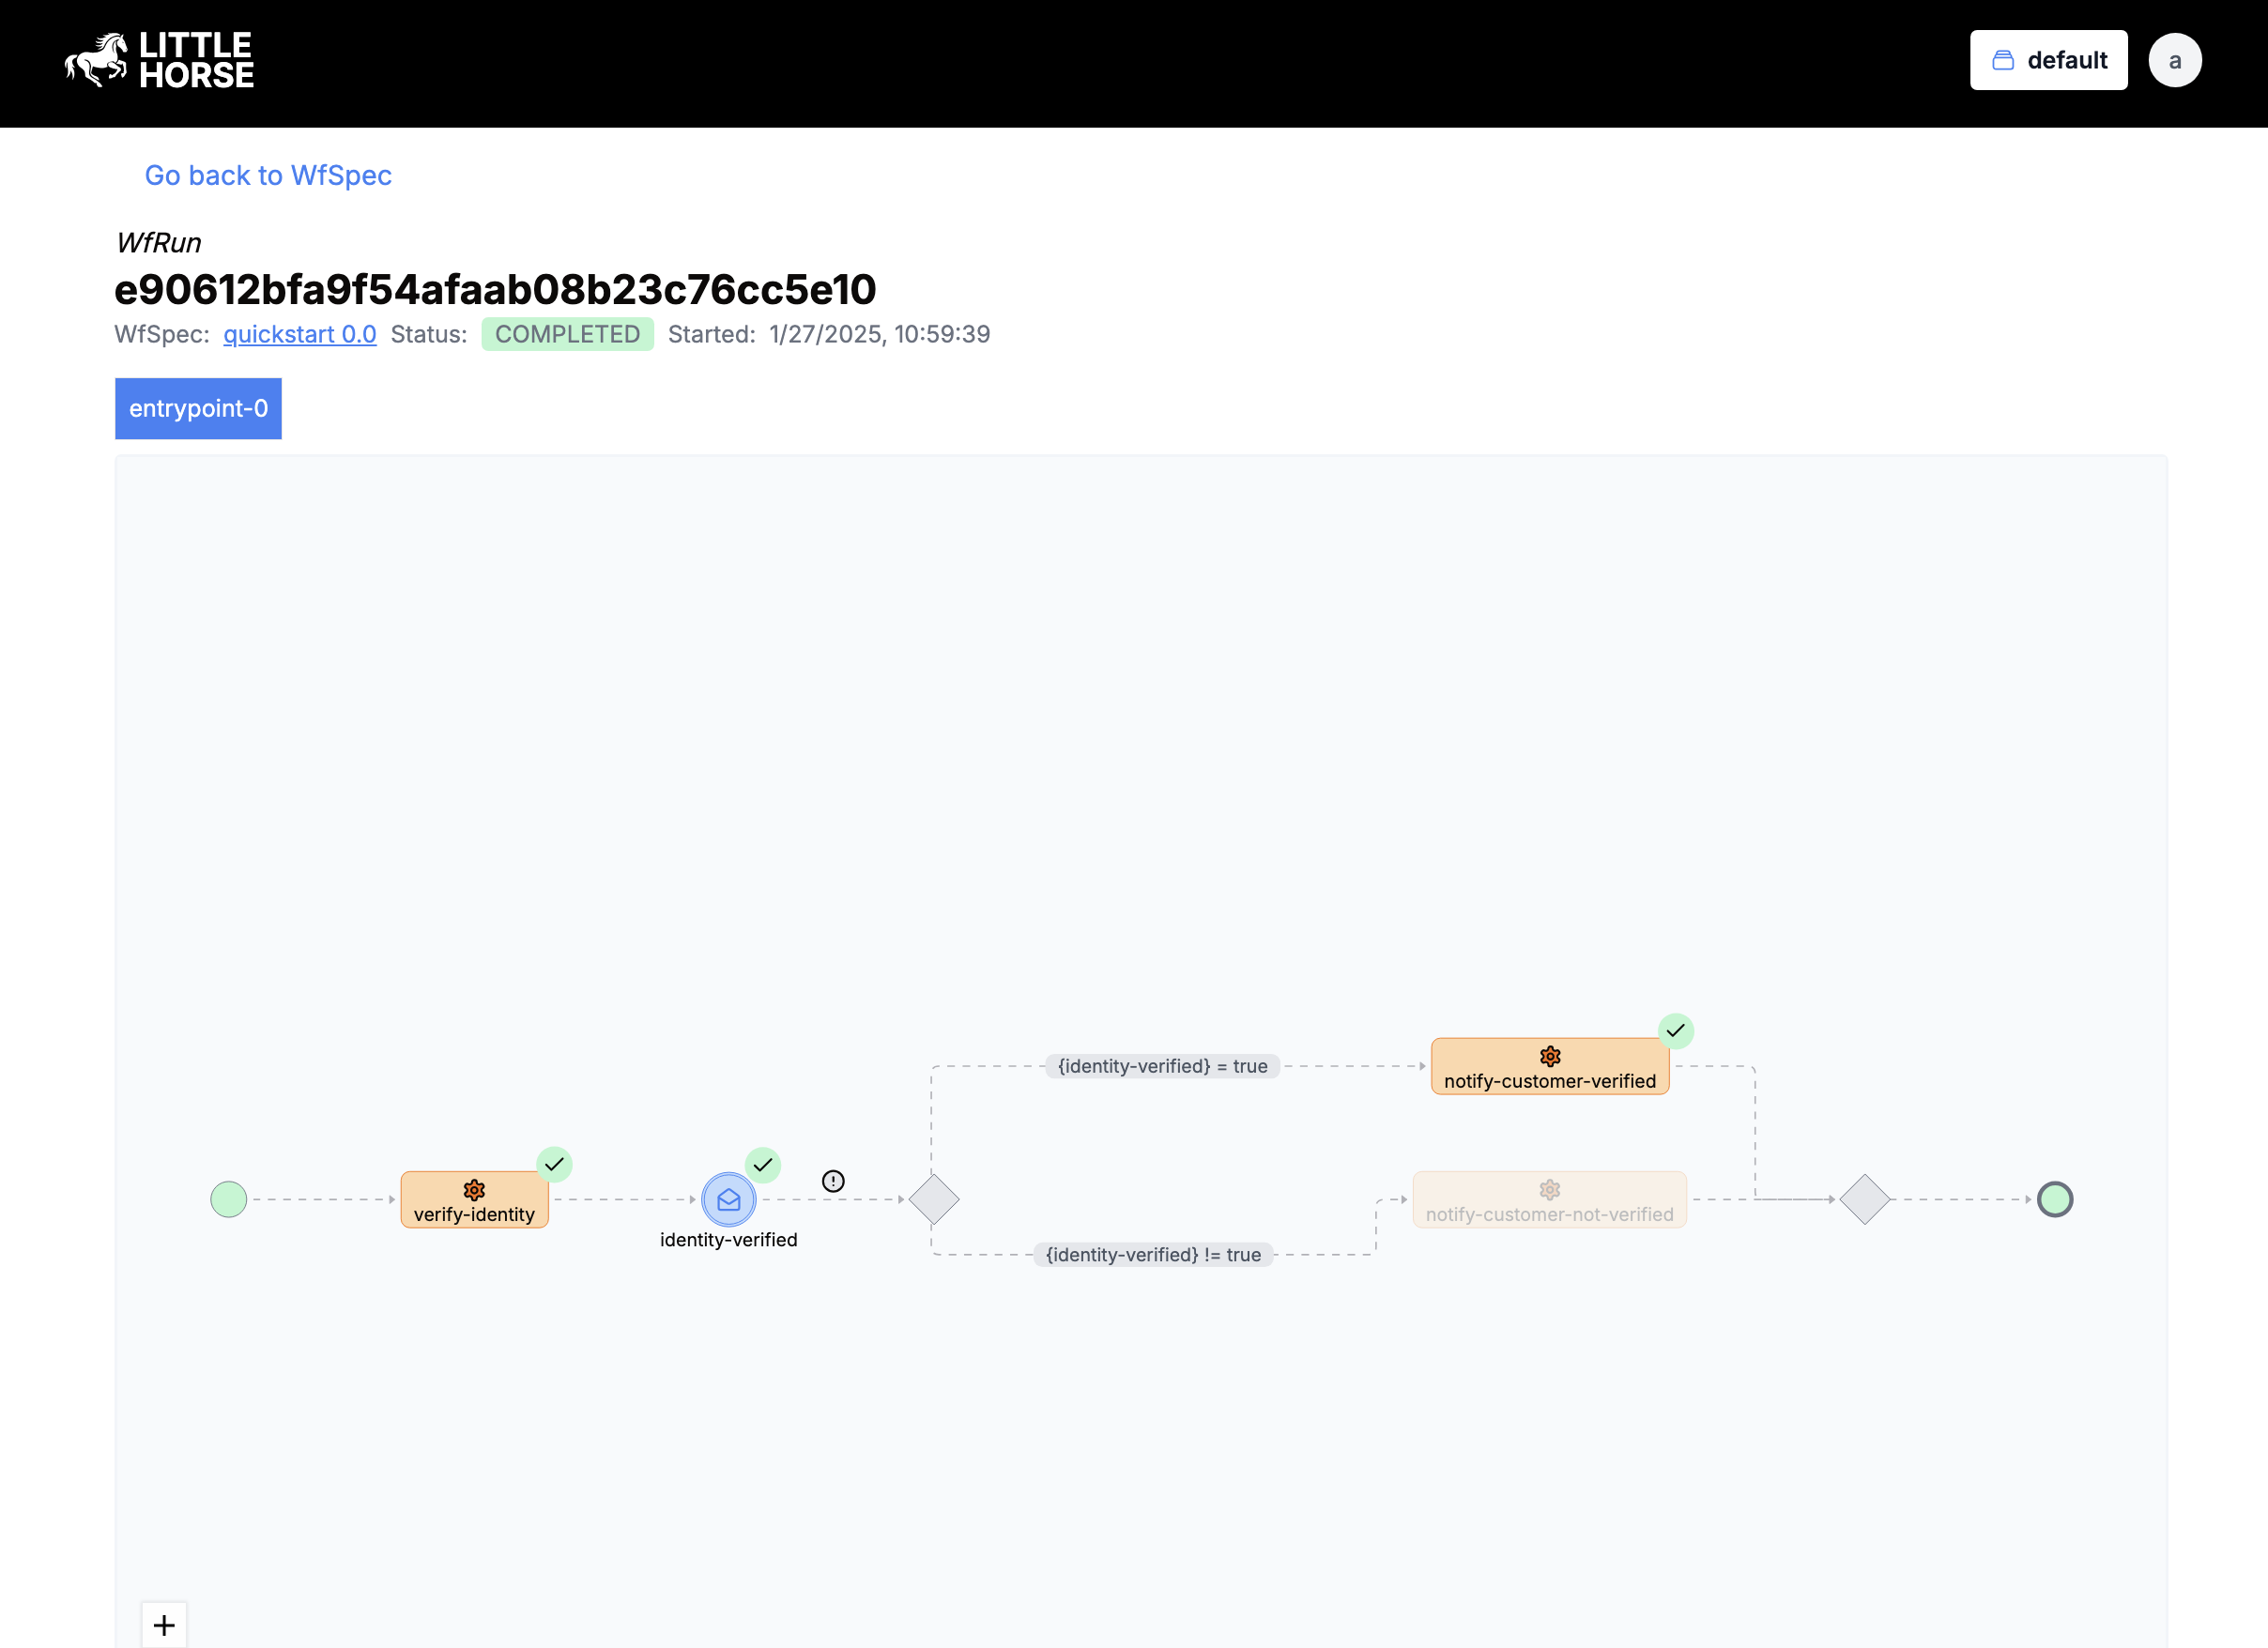
Now if we look at our WfRun again, you will see that the workflow has completed and Obi-Wan has been notified that their identity has been verified.

Wrapping Up
Congratulations on executing your first WfRun at LittleHorse! You've taken your first steps into a larger world. Continue on with the next courses to learn how to develop your own applications on top of LittleHorse.
In the meantime, if you haven't done so already:
- Join the LittleHorse Slack Community
- Give us a star on GitHub
- Check out our documentation