User Tasks Bridge
This guide will walk you through using User Tasks Bridge in a complete local development setup.
You will do the following:
- Spin up a local LittleHorse + User Tasks Bridge environment using Docker
- Define a
UserTaskDeffor approving an IT rental - Register supporting
TaskDefs for handling the workflow - Create a
WfSpecthat includes a human approval step - Use the User Tasks Bridge Console to view and complete assigned tasks
What is User Tasks Bridge?
The open-source LittleHorse Kernel natively supports User Tasks. However, the LittleHorse Kernel does not support the concept of user identity as it would require adding significant amounts of complexity and external dependencies to the open-source project.
User Tasks Bridge connects LittleHorse User Tasks to an identity provider (IdP), so users can be assigned and authorized to complete human work.
Setup
Our quickstart uses Java. The LittleHorse SDK is available in four languages (Java, Go, Python, C#) for defining workflows and interacting with LittleHorse. User Tasks Bridge exposes a REST API, so you can use any language that can make HTTP requests.
For examples of how to use User Tasks with other languages, check out the User Tasks Concepts page of the LittleHorse Kernel documentation.
Your system needs:
- Java 17 or greater
- Docker configured with at least 4GB of RAM
- Homebrew
Start the Docker Image
For development purposes, we ship a Docker image, ghcr.io/littlehorse-enterprises/lh-user-tasks-bridge-backend/lh-user-tasks-bridge-standalone, that contains User Tasks Bridge and its dependencies. Let's start the image:
docker run --pull always --name lh-user-tasks-bridge-standalone --rm -d \
  -p 8080:8080 \
  -p 8888:8888 \
  -p 8089:8089 \
  -p 3000:3000 \
  -p 2023:2023 \
  -p 9092:9092 \
  ghcr.io/littlehorse-enterprises/lh-user-tasks-bridge-backend/lh-user-tasks-bridge-standalone:0.15.2
The standalone image contains User Tasks Bridge and all of its dependencies for local development, all running on localhost:
| Component | Port | Protocol |
|---|---|---|
| LittleHorse Server | 2024 | GRPC |
| LittleHorse Dashboard | 8080 | http / web |
| Keycloak Admin Console | 8888 | http / web |
| User Tasks Bridge | 8889 | http / rest |
| User Tasks Bridge Console | 3000 | http / web |
| Apache Kafka | 9092 | Apache Kafka Protocol |
Users and Credentials
For convenience, the docker image has a setup script which configures the Keycloak, which is what we use as an implementation of an OIDC-compatible identity provider. The script creates a master realm and configures three users in Keycloak:
| User | Pass | Realm | Email Address |
|---|---|---|---|
| my-user | 1234 | default | someemailaddress@somedomain.com |
| my-admin-user | 1234 | default | someotheremailaddress@somedomain.com |
| admin | admin | master | N/A |
The Docker image takes about a minute to start up (it has quite a few things inside it!), but once it's ready, go ahead and log into the User Tasks Bridge Console:
- Open
http://localhost:3000in your browser. - Click
Sign Inand use the credentials formy-admin-user.
Other Dependencies
You'll need our lhctl command line client:
brew install littlehorse-enterprises/lh/lhctl
Next, clone the lh-developer-hub repository on GitHub:
git clone https://github.com/littlehorse-enterprises/lh-developer-hub.git
cd lh-developer-hub
Running the Quickstart
The quickstart workflow we will use today models a classic "IT Request Approval" flow.
Register the WfSpec
To register the WfSpec, all you have to do is run the application:
./gradlew -p examples/user-tasks-bridge/00-quickstart run
This will register the WfSpec, UserTaskDef, and TaskDefs, and it will also start the Task Workers that will be used in the workflow. You can check out the workflow in the LittleHorse Dashboard:
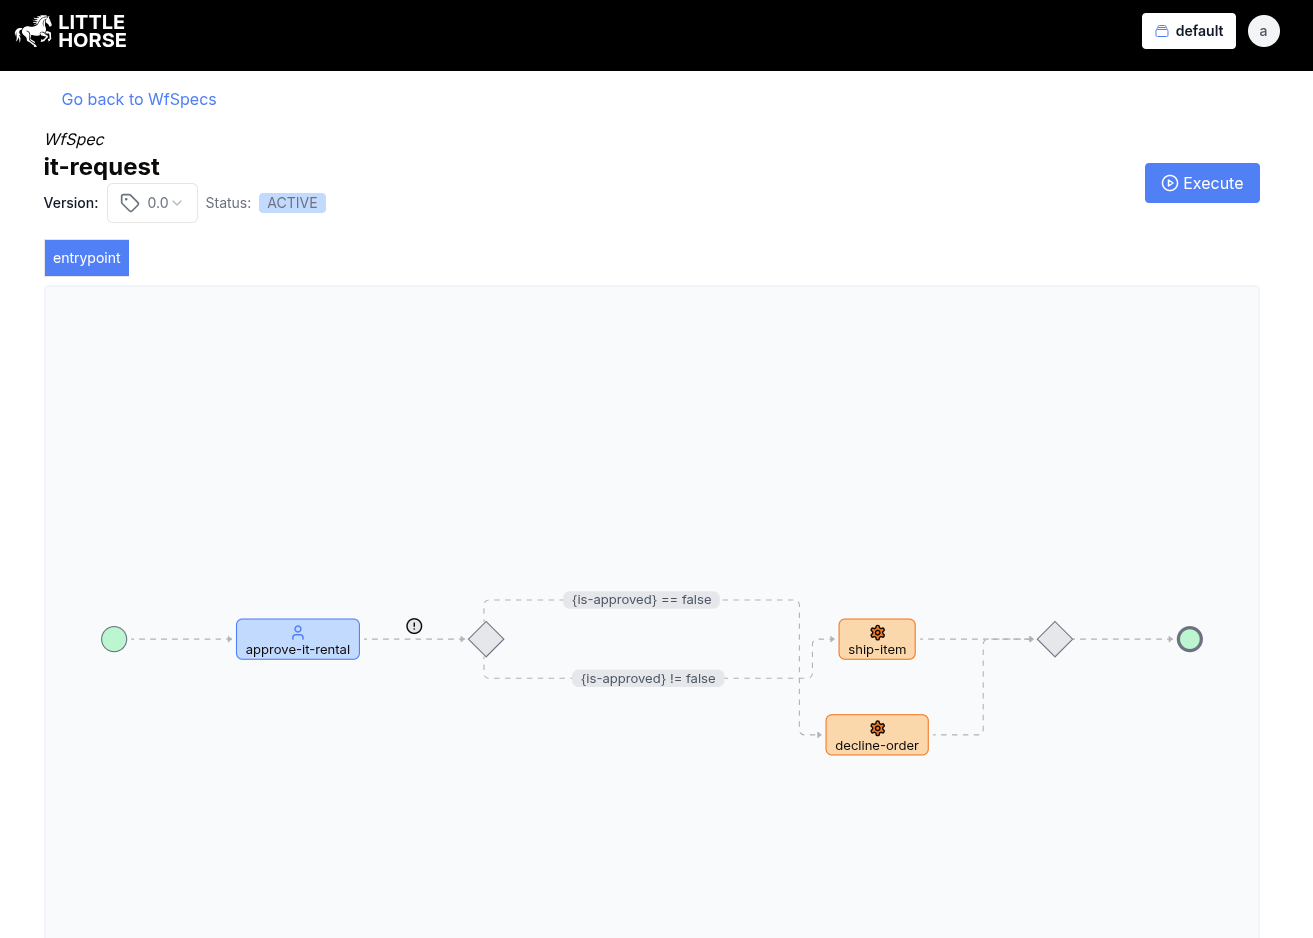
If you're curious about this step works, read the code!
ITOrderWorkflow.javadefines theWfSpeclogic.OrderTasks.javainclude two dummy task workers.Main.java, which registers all of the metadata and starts the Task Workers.
Run the WfRun
Let's run the workflow! Obi-Wan wants a new lightsaber:
lhctl run it-request item laptop employee obi-wan
In the LittleHorse Dashboard, you'll see the WfRun waiting for the UserTaskNode as follows:
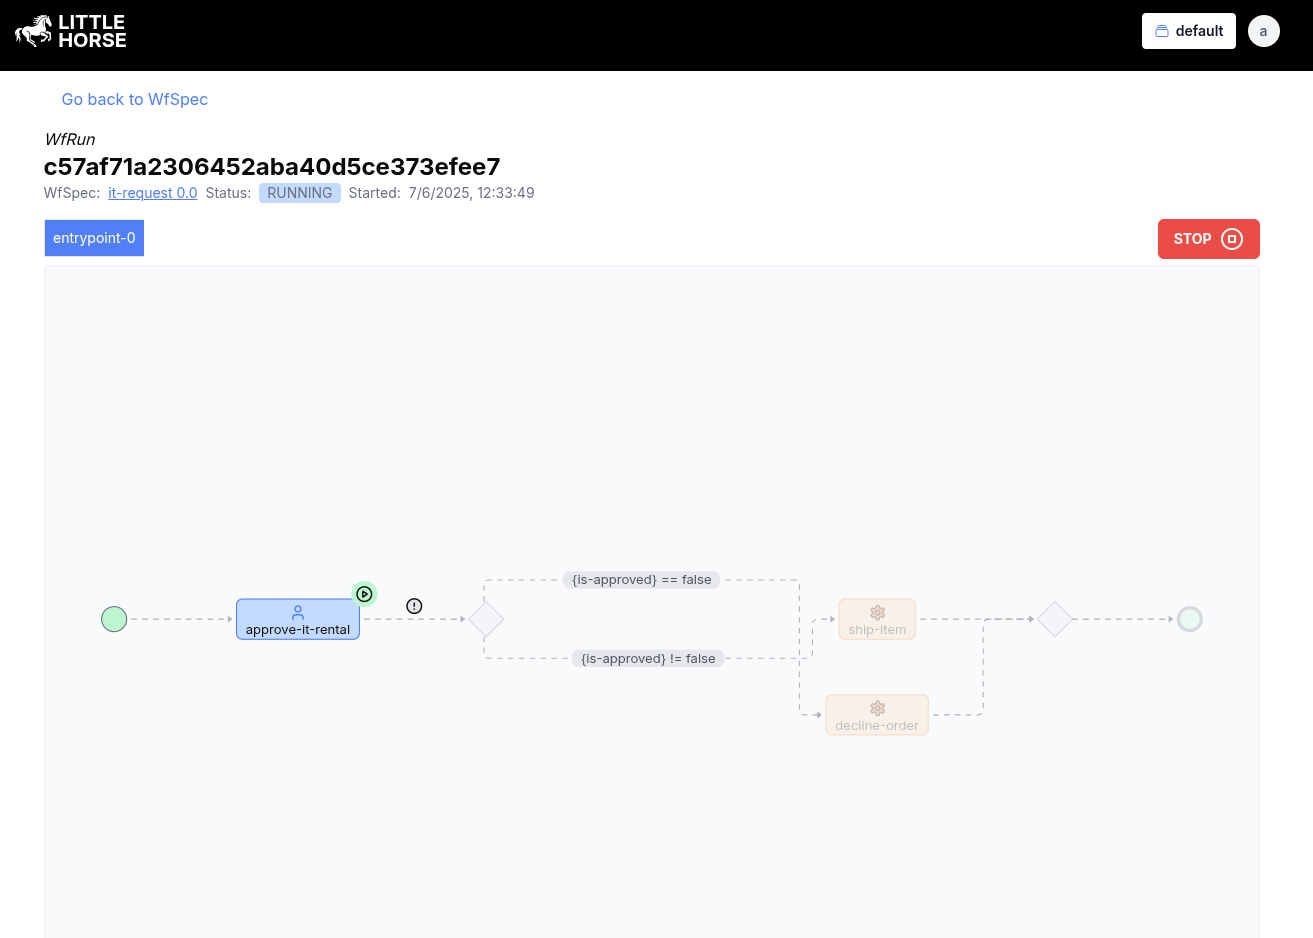
Execute the UserTaskRun
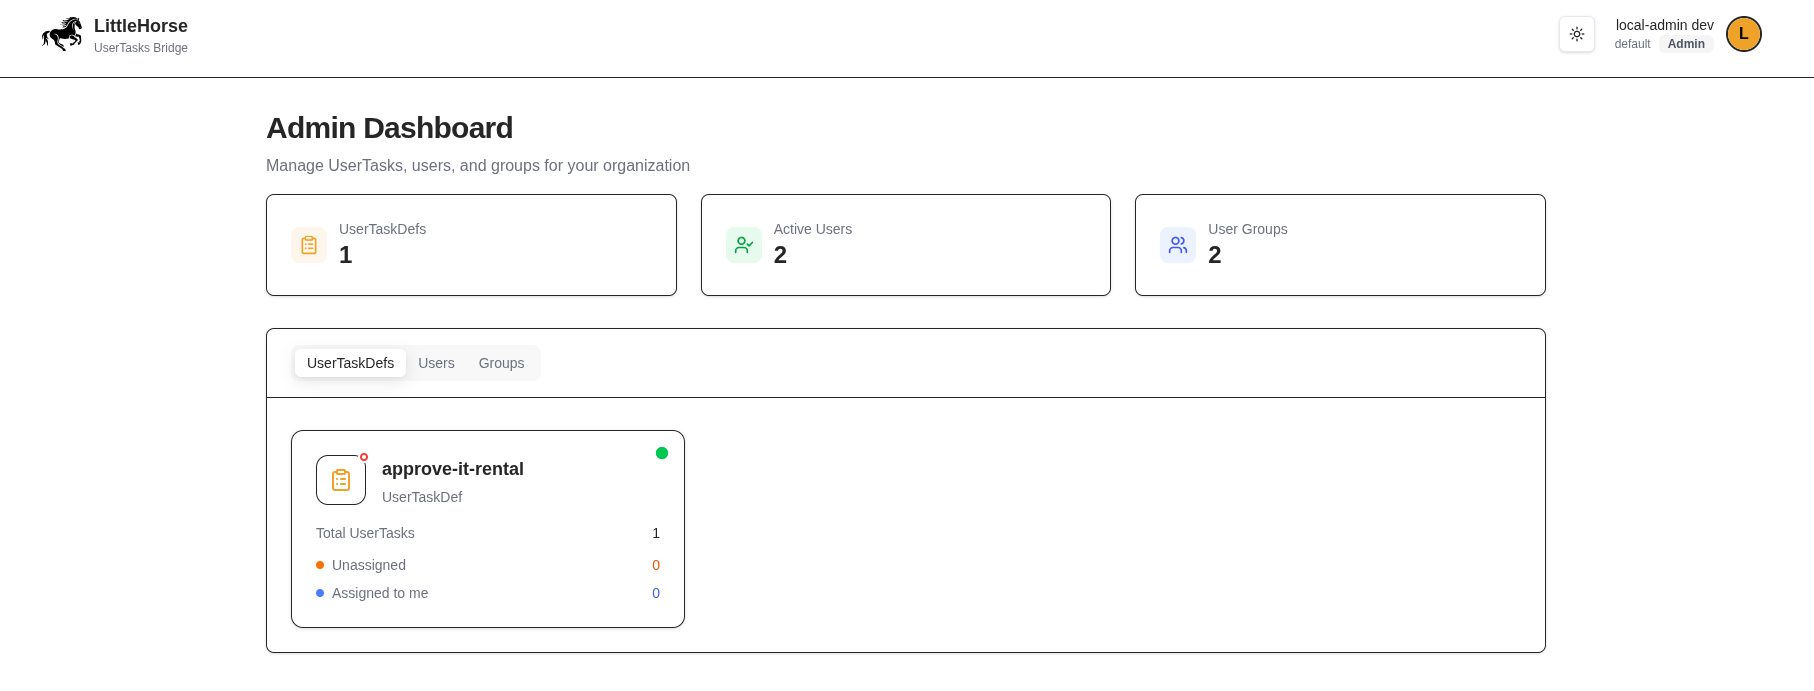
Go back over to the User Tasks Bridge Console and log in as my-admin-user. You'll see the UserTaskDef:
When you click on the UserTaskDef, you can see the UserTaskRun from our workflow that we just ran. Note that it is assigned to my-user with the email address someemailaddress@somedomain.com.
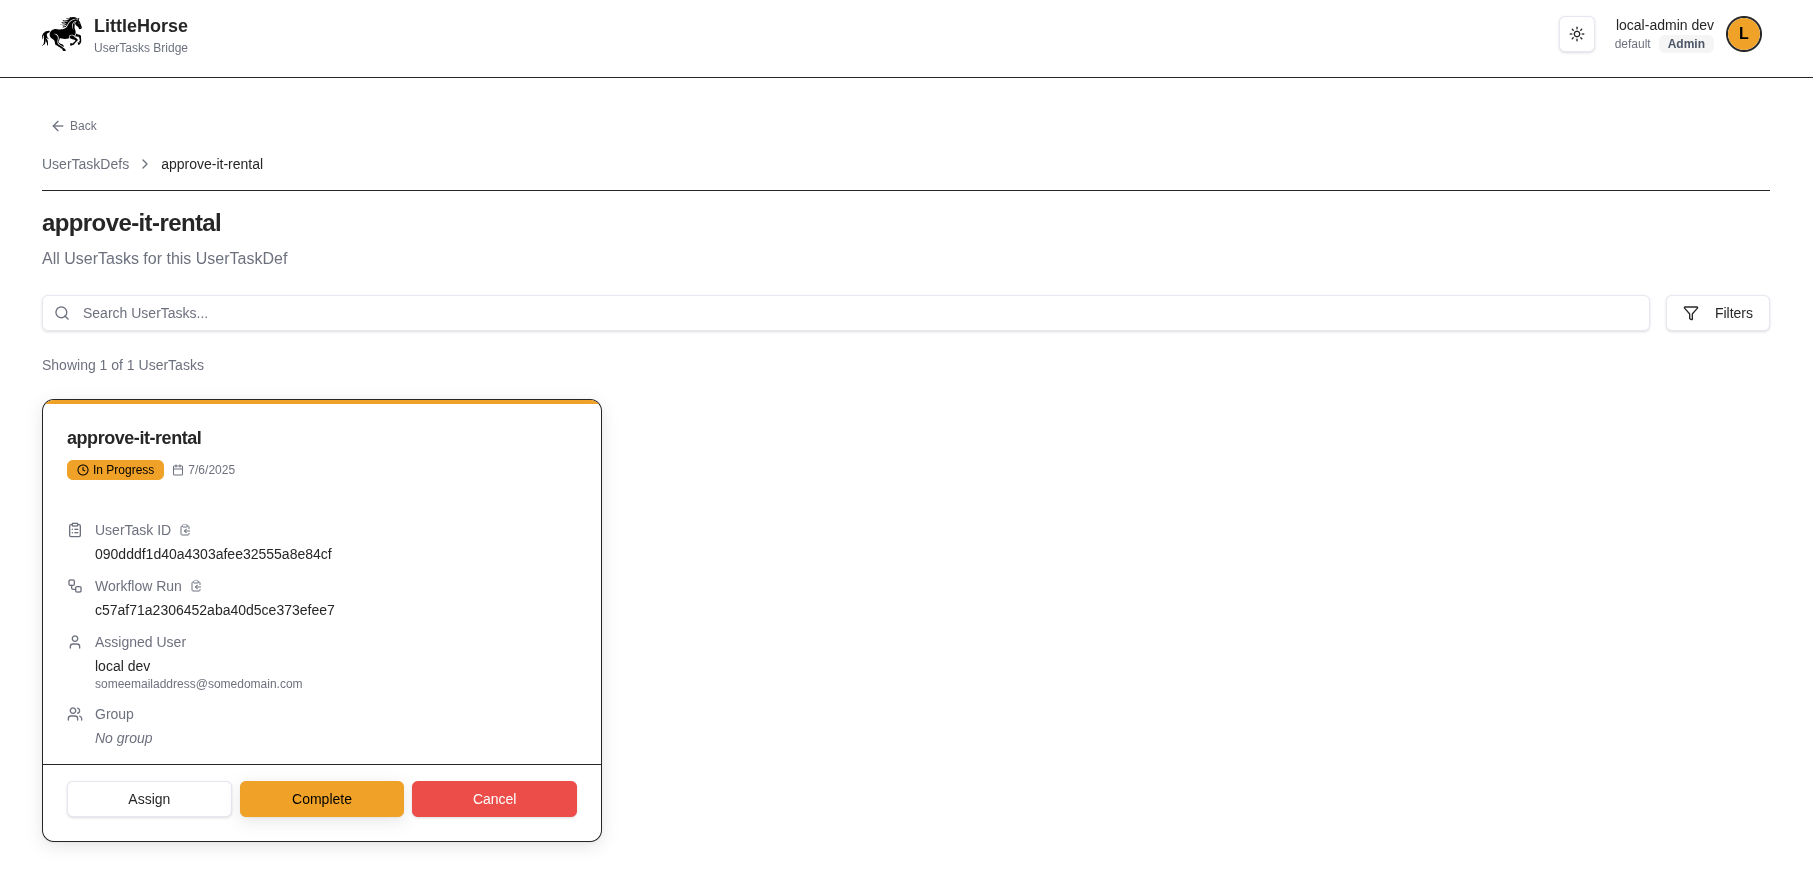
Since you're logged in as an Admin User, you can complete UserTaskRuns that are assigned to other users. Go ahead and click on Complete, fill out the information, and then head over to the LittleHorse Dashboard to check out your WfRun. It should be completed!
Next Steps
If you've made it this far, join us on Slack and give us a star on GitHub!
To explore further, here are some ideas in order of increasing difficulty:
Create More Users
If you log in to the User Tasks Bridge Console as my-admin-user, you can create additional users and specify their credentials. Try doing that, and then:
- Using the same
WfSpec, try assigning theUserTaskRunfrom the User Tasks Bridge Console (while logged in asmy-admin-user) to your new users.- Then, in an incognito window, log in as the new user and execute the
UserTaskRun.
- Then, in an incognito window, log in as the new user and execute the
- Try editing the
WfSpecinITOrderWorkflow.javato assign it to different users!
Create Groups
The my-admin-user can create Groups in the User Tasks Bridge Console. Next, add some users (or just my-user) to one of the groups you create.
Finally, edit the WfSpec to assign the UserTaskRun to a group instead of a user.
Here's a hint:
UserTaskOutput result = wf.assignUserTask("approve-it-rental", "my-user", "my-group");
wf.releaseToGroupOnDeadline(result, 60); // 60-seconds
If you're really feeling adventurous, try creating a reminder task!
Build Your Own Frontend
User Tasks Bridge exposes a backend that has a well-documented API that can be accessed using HTTP requests or by using the Typescript API Client that exposes a type-safe interface for interacting with the backend.
Try it out!